Thursday, September 16, 2010

Page 24: The Monster at the End of the Book...

Here's to hoping that their parents have read the book "The Monster At The End Of This Book" (starring Grover)... it was one of my absolute favorites as a child.

Anyhow, this page loosely relates to this book- the title for the page is "The Monster" at the end of the book .... is LOVED!

I did call my brothers and make sure that they wouldn't oppose to having their angelic boys called "monsters". They assured me that it was a-ok with them.
There's a mirror (plastic) and the title, surrounded by the "stars" who love them! :)

Here's a picture that shows the whole scene... along with my reflection while trying to take the picture... :)
This is the last page, granted I have some finishing touches to put on some of the pages still, and then of course to actually "finish" the edges, create some sort of system to keep them all together in the cover, AND find a way to personalize the cover a little bit. (Still haven't figured that one out). So, I still have a LOOOONNNNGGGG way to go with this project, but the pages are done (well, mostly!)

Sunday, September 12, 2010

Page 22-23: ABCs

"ABC it's easy as 1 2 3" has been running through my mind the whole time I have worked on this page. I got my inspiration for this page here. I had to make the pocket twice, the first one I made was just too small for ALL those letters. I did have to add a couple of letters so that they will be able to spell their names... so there's about 55 letters.

When you open the page- this is how it will look. Thinking about a title, but not sure there's really room for one... 

The pocket flips down- and the letters are stored there.


The alphabet. With a couple of punctuation marks.
There's enough letters to spell out a few different words, and like I said their names for sure! :)
This page took a little bit of time- I had to cut 3 inch squares of cloth, then I ironed on letters I bought at Micheals (1 letter per square), then pinned the squares of materials onto felt- whatever I had left over from this quiet book project, and then zig-zagged around each letter, then cut them out with pinking shears. The tutorial I was following suggested using velcro- but I think felt against felt sticks well enough.... and if not, then I guess I will be ironing on velcro. ... or maybe their mothers will be? :)


Just one more page. I am not sure exactly what it will be yet, but there's some ideas trying to take form in my mind that will eventually result in the last page! :)

Friday, September 10, 2010

Page 20 -21: Make a Face

Well this page was a great idea in theory. I am not sure that I am super happy with the results, but at this moment in time... it will have to suffice. :) I got my inspiration for this page somewhere out there on the web, but who knows, I didn't bookmark this page. Probably should have cause I needed a little help! lol

So the face is blank, and made out of felt, the face pieces have velcro on the back of them...

And tilted your head.... to the right, and you can see one option of a funny face


Here's another option.
And another option.
I don't know. I guess this page required a bit more artistic ability then I possess. The part that I am most unhappy with is the mouth, I think I need to make a new mouth, then I may be ok with this page.

Oh well, it's supposed to be goofy- and I guess it is! :)

Thursday, September 9, 2010

Page 19: Barn & Finger Pupppets

I have been WAITING to do this page for so long. From the very first time I saw this page here, and then again here, I KNEW I was doing this one. I have resisted moving it forward in the book, but I thought about it more than once, cause I was so excited to make it! :)

Here's the barn. I am thinking about adding a rooster and putting him up in the window, what do you think?

And tilt your head to the right to see this one (thanks a lot auto-rotate!!) There's a little pocket for the puppet animals to hang out in when they are not in use. 

And here's the puppets... they turned out so cute! :) 

I am getting down to the very end of this book, I think I will have 3 more page posts (page 20-21, pages 22-23, and then page 24). I can't believe that I am almost finished with the pages. Of course, then I need to actually "finish" the pages and get them into the cover- which may prove to be an entertaining challenge... BUT I will cross that bridge when I get there.

Wednesday, September 8, 2010

Page:18 - Family Tree

Well, here's the page. It's not really quite completed-- but close enough. I still need to laminate the pictures, once they are "approved" by Jared and Clayton. For now, I have included the pictures that I think will work.
David's Family Tree

Van's Family Tree

The pictures all in the pocket underneath the tree, and then they just place them in the correct location on the tree.

I borrowed my aunt's embroidery machine. I learned a lot about how to use it! :)

Thursday, September 2, 2010

Pages 16 & 17: Puzzles

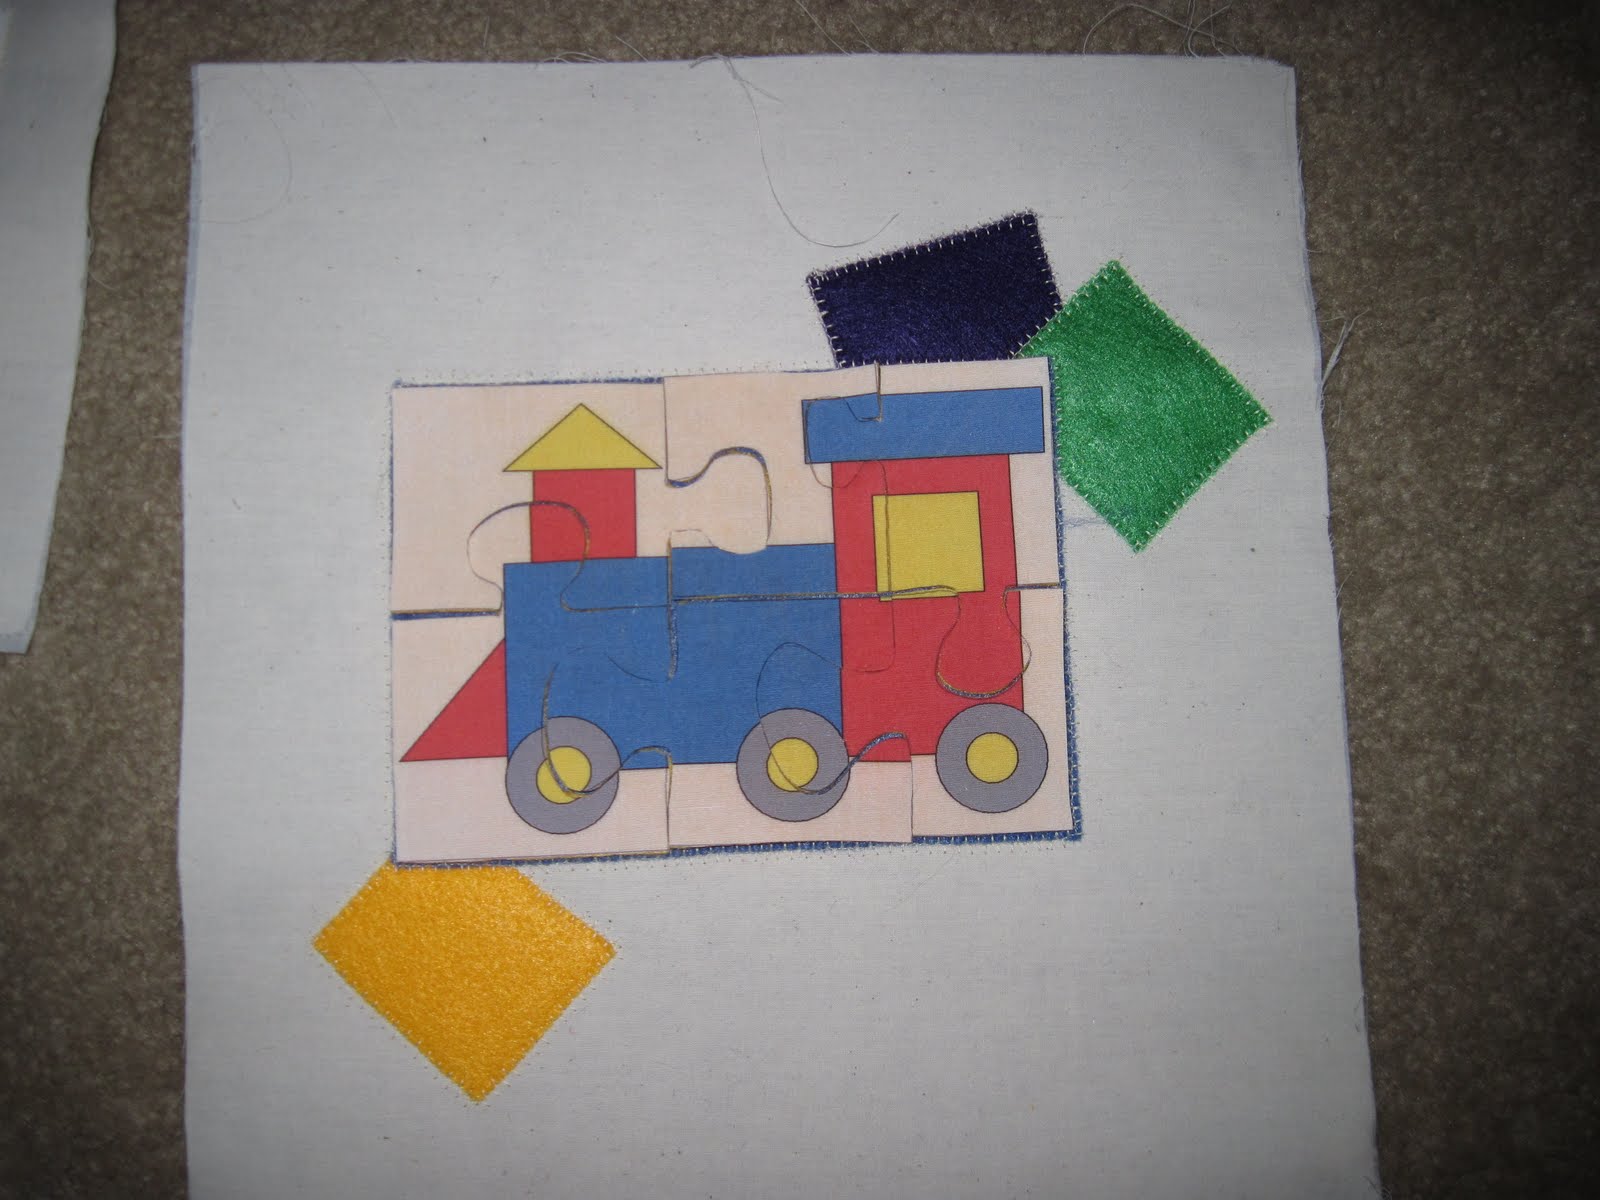
Ok, so this page was going to be a page with a train on it, that you remove the wheels by unbuttoning them. But I just wasn't into it... so, I did this one instead! :) And I think it turned out pretty neat!

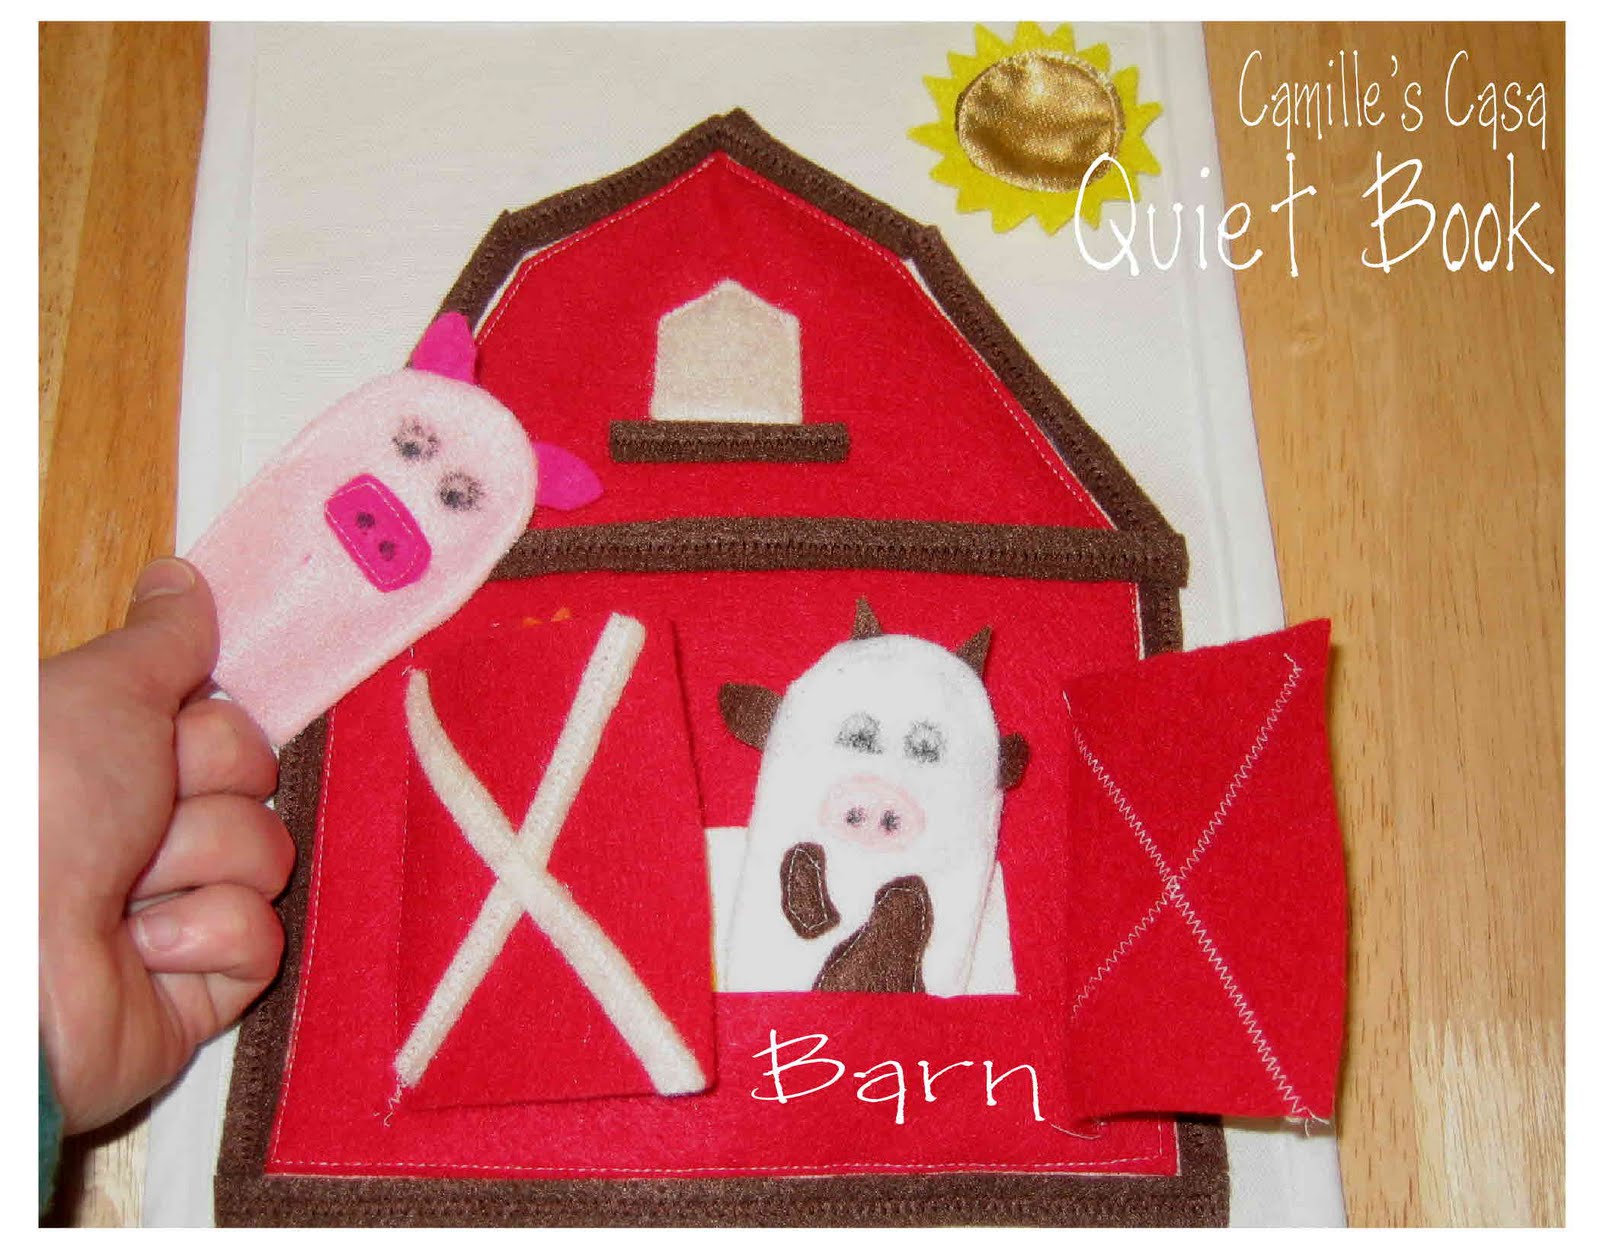
Here they are- the page on the left has pockets that contain the puzzles, and the page on the right is where you assemble the puzzles. 


The assembly square is made of felt, so are the backs of the puzzle pieces- and they stick together decently.
The pocket page. 


Talk about a learning process. I made the middle one first, but didn't bother to measure anything, just eye-balled it. And then I needed to make 2 more, so I tried to use it as a pattern, but as you can see, my other 2 pockets are just a little bit bigger. Oh well. Character matters, right?! :)

Oh, and I hand stitched the titles "Puzzle 1, 2, and 3". Not too hard, but I doubt I will sign up to do that again any time soon. Just time consuming, but it turned out quite cute! :)
Assembly page. Kinda plain, I know.


The pocket is open.

Pocket with the puzzle pieces showing...

Puzzle 3: The Helicopter assembled
Puzzle 2: The Truck assembled


Puzzle 2- showing the felt on the back of the puzzle.
Puzzle 1: The Train assembled

The puzzles weren't too bad to make. I found some printable puzzles online here, and printed them onto printable fabric, ironed on some iron on backing, and then ironed them onto the felt. Then I just cut out the pieces. No big deal, and totally adorable! :)

Oh and I chose the "easy" puzzles they have more complicated ones for older kids. I figure these are complicated enough for now! :)